

Written by Ylenia Cantello

You have seen that landscape photography and you wanted to buy the fine art print, but you wonder how to light it once it hangs on the wall of your house?
Then know that this is a subject that is very close to my heart because the lighting of a fine art print is vital to be able to fully enjoy it.
I thought I'd share some of the suggestions on choosing the right light that can make the difference to enhance both the print and the entire room.
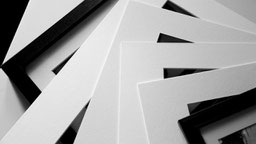
The print you love only needs an ideal environment to be brought to the center of the scene and not to be hidden in a corner in the shade or under the direct rays of the sun.
So if you want to enhance the beauty of your print and recreate the typical lighting of museums and galleries at home, discover which are the 4 aspects to consider: your fine art print will always be in the center of the best light and admired optimally for long time, regardless of whether you use an elaborate lighting system or a single soft light point.
1 - LIGHTING AND LONGEVITY
First of all, an important and often overlooked aspect of those who buy fine art prints is to determine which conditions will best preserve the prints themselves.
In fact, often too aggressive types of lighting are chosen, believing in this way to enhance photography. In reality, however, the strong light intensity can cause excessive heat on the surface with consequent damage to the print such as: color distortion and increased fragility.
So how do you guarantee a long life for your fine art prints that you love so much?
Here are some useful rules to follow:
A - Avoid direct sunlight
It is known that ultraviolet light and infrared radiation can fade images. So it is better not to allow sunlight to reach the printing surface directly. This will protect it from heat damage.
B - Avoid fluorescent lighting
This type of light also emits a high level of ultraviolet energy, which accelerates the fading of the color and distorts the color of the print.
C - Avoid placing the light too close to the print
If you try to put a hand between the print and the light source and feel heat, it is likely that the light is too close to the image and is causing thermal damage.
2 - THE DIFFERENT TYPES OF LIGHTING
Now it's time to choose the type of light that will make your fine art print the protagonist on the wall. But how to decide which lighting is best? Here are some considerations to help you choose:
A - Luminous intensity
In general, lighting to highlight your prints should be at least twice as bright as the rest of the room's ambient light. This effect can be achieved by using the appropriate intensity or atmosphere.
It is obvious that a good balance must be found to prevent the prints from becoming the brightest thing in the room.
Perfect lighting should enhance the natural beauty of printing, without feeling obvious or intrusive.
B - The choice of lights
To ensure that the colors of your fine art print are accurately represented, look for high percentages of CRI (color rendering index) in your lights. The choice of the color temperature of the lights is also of fundamental importance.
But what is it exactly?
The color rendering index (CRI)
CRI is a scale from 0 to 100% which indicates the accuracy of a given light source in rendering the color with respect to a reference light source. The higher the CRI, the better the color rendering capacity. The closer it is to 100%, the more vibrant the colors will appear.
The color temperature
Color temperature is a number assigned to a light bulb that indicates how hot (yellow) or cold (blue) is. The color temperature is measured in degrees Kelvin (K) on a scale of 1,000 to 10,000. Light with a color temperature below 3500K appears warm, while a color temperature above 4000K produces a cool shade.
So if your home has warm white lighting, I suggest a color lighting temperature from 3000K to 3500K for your fine art prints. If, on the other hand, you have a cold-white house, then I recommend a lighting color temperature of 4000K for your artistic photographs.
What are the different light options available?
a) LED lights
LEDs have a long life, do not emit UV rays and have very low heat.
Choose these lights if you have little space available between the fine art print and the light source.
They are available with different color temperatures: hot and cold.
b) Halogen lights
Halogen lights emit a colder tone but generate higher levels of heat.
To minimize the damage it is therefore necessary to keep them at a safe distance from the fine art print and perhaps consider the purchase of UV filters
c) Incandescent lights
The traditional incandescent lights generate a warm and comfortable light, but they should be avoided both for the excessive heat they generate and for the dominate of too yellow-orange color, and for the energy and environmental inefficiency.
C - Light bulb radius
Each bulb has its own radius that determines the width of the circle of light.
The diffusion of the light bulb radius is measured in degrees as a corner.
To give you an example, a 25 ° light bulb in a ceiling luminaire will illuminate a fine art print of about 100x100 cm. A 10 ° light bulb will brightly illuminate a smaller print.
As the ray widens, the intensity of the light decreases.
Therefore, when you illuminate larger prints, I suggest you install two or three separate lights on the print itself, instead of buying a bulb with a wider beam.
3) THE LIGHTING DEVICES
Let us now review the lighting devices that ensure a "museum effect".
A - Ceiling lighting fixtures
They are also called accent lights because they allow you to adjust the light direction and focus attention on the single fine print art.
In fact, the most common way to effectively illuminate your photographs is to install a ceiling fixture that can be recessed or mounted on the surface.
Most devices allow you to use the type of light bulb you prefer, so you are free to use the spotlights that best align with the aesthetics of your home.
Let's look at some examples of ceiling lighting equipment:

a) Recessed lights
These recessed directional lighting units are adjustable and allow you to illuminate your fine art print with perfect light. The color temperature should be 2700k hot and the CRI above 95 to ensure the best and true visual impact of the print.
However, they have the disadvantage of not being able to be moved without intervention on the ceiling, in case you decide to want to change the decor and layout of your prints.

b) Track lights
The track lights with adjustable lamps are a great option to cover a larger print or a wall that includes more works.
Equipped with the right lamps, they behave in much the same way as recessed lights, but offer some other advantages.
They are easier to install and obviously offer future flexibility. Consider this possibility offered by track lights if you think that in the future you will have to change the decor of your home.

c) Ceiling lamps
They can be adjusted upwards or downwards and can be mounted on a wall or ceiling.

B - Lights mounted on the frame or on the wall
This is a good choice if you have high ceilings: in fact you can choose to mount the lights directly on the back of your frame or on the wall to which it is hanging. In this case the light source is very close to printing and you have to use safe light bulbs for artistic prints like LEDs, at very low power. This technique perfectly illuminates your print, regardless of where it is placed, attracts attention and provides a sense of intimacy with the press, inviting you to take a closer look.

4 - INCLINATION OF THE LIGHT
The next step is to understand how to position the light source to obtain the perfect illumination of your fine art print.
It is important that the light of the image is projected well beyond the photograph and also above to guarantee a direct reflection in the print itself.
Ceiling-mounted lights should be positioned so that the light beam hits the center of the print. There is an optimal inclination that allows you to reduce any type of glare or reflection on the glass that disturb the eyes of the observer, and allows you to cover the print with the right amount of light.
This angle for light is 30 °.
If your print has a large frame, add another 5 degrees to avoid projecting shadows due to the frame itself.
If instead you want to enhance the texture of the paper (like for the Hahnemhüle Photo Rag paper) I suggest you subtract 5 degrees.
ARE YOU LOOKING FOR AN ARTISTIC LANDSCAPE PRINT?

Other posts for you

10 tips for staying overnight in a mountain hut
How to choose the fine art print size: 5 things you need to know

How to find your personal photographic style
Newsletter
Do you want more creativity and nature in your life?
Sign up for the Newsletter: get more inspiration and discover the latest news